Showing posts with label Recipes. Show all posts

Friday, April 5, 2013

Fun Frugal Snack: Peanut Butter & Bananas

I've browsed around on Pinterest a lot and have pinned a ton of things.. a lot of pretty brilliant things!  There are some smart, creative people out in the world!  I love learning from them!

I especially love learning about new ways to not let things go to waste.  I hate waste.

I found this idea intriguing, and decided to give it a try.  It's one of those that you can't really mess up (we've all seen those pinterest experiment disasters, right???)

So I  had a couple of bananas that were past their prime.  I normally make banana bread, but my recipe needs 3, and I only had two.


First you slice them.  Then you spread peanut butter on them.  Then you stick them together.


You can eat them like this if you like (I think my older girl would have prefered them this way), or you can pop them in the freezer, which is what I did.

My younger girl, who could live on peanut butter, loved them.  My oldest I don't think cared much for the frozen texture.  My husband just said interesting.   I personally detest bananas, so I have no opinion on the matter.  ;)

Read more...

Tuesday, December 11, 2012

Persimmons!

I told you guys about the persimmons that I had received in my bountiful basket last week.   When we got them, they were totally soft.  You broke the skin and it was complete puree!  We were told that they should be that way, and they certainly weren't rotten, but they were definitely too messy to eat as a fruit, so I went on pinterest and did a little digging.

The first recipe I came across that sounded pretty good was this persimmon cookie with orange glaze.  I whipped up a bowl of the cookie mix, but I did not feel like making the glaze, so I popped open a tub of cream cheese frosting instead, and it did the trick. ;)  Not my most favorite cookies ever, but still pretty good for trying to use up an item you've never eaten before and did not even know if you liked!  Sorry folks, I didn't snap a pic of these.

I thought that I was only going to need to come up with one recipe, since I only had 4 little persimmons, but alas, my cookies only used up 2 of them, so back to pinterest I went.  This time I found bread.

This persimmon cranberry bread recipe to be precise.  The recipe called for dried cranberries, but I had some fresh ones left over from Thanksgiving that I needed to use up, so I thought it would be a win-win.

I only had two persimmons remaining, so since this recipe made two loaves, I halved it and only made one loaf.  I still found myself a little bit short on persimmon pulp, so I added an applesauce cup to equal out the amount of puree I needed.   (I often substitute this for an egg in my banana bread as well.  Makes it very moist, and lets me leave out a bit of the sugar in the recipe).

Here's the loaf fresh out the oven.

Here's a slice all nice and buttered up.  =)

I thought the bread came out very good.  My girls did not like the fresh cranberries in there and picked them out.  I honestly probably could have used less, even up to half of what I added (I sort of did the sprinkle until it looked about right method).   There were quite a few per slice, and they were pretty tart!  But all in all, not a bad recipe.

I have 9 more smaller persimmons this week (they seem to be a different variety, and much firmer!), so I'm thinking of attempting this bread one more time, and using a bag of chocolate covered raisins I got marked down for $0.79 at Aldi instead of the cranberries.  Chocolate makes everything better, right?  Sounds like a pretty delicious substitution to me!

Read more...

Monday, July 9, 2012

Experimenting With Chicken (& Some Leftovers)

On last week's menu, I intended to break out my rotisserie and cook a chicken on Saturday.  Then I saw another blogger's menu which had a recipe for crock pot rotisserie chicken.  

I love rotisserie chicken.  I hate my rotisserie.  In fact, I don't even know how to get the chicken in there, and as I don't even like touching raw meat that much to begin with, so that is a husband job.  And if you know my husband's work schedule (which thankfully he is having a short reprieve from at the moment) that just doesn't happen very often.

So, you can imagine I was intrigued when I saw this crock pot idea.  I even read lots of comments from others that they always made theirs that way.   I googled and I found a plethora of ways that it should be cooked...skin off, skin on, breast down, breast up, flat on the bottom, sitting atop a bed of foil balls to lift it above the grease, sitting above a bed of foil wrapped potatoes which bake along with it...it went on and on.

Finally I saw one post (that I can't even find again now or I would link to it) that said she put hers on top of celery and onions.  She never said that she did anything with them afterwards, but a nice soup stock immediately flashed in my mind!

So here's what we did.  We sliced up some celery and lined the bottom of the crockpot.  And also the last of a bag of baby carrots.

My husband injected the chicken with italian dressing like he always does when we rotisserie.  Then we placed it in the crockpot with the skin on, because that's just how we roll, and breast down, because he said it would be juicier that way.  Then I sprinkled some seasoning atop the bird and closed the lid.


It cooked on high for about 5 hours.   I could not get a picture of the cooked bird because, well, it completely fell apart when we lifted it out.

However, it was quite delicious, in pieces though it was.  Oh well, we were going to have to shred it for the kids anyhow....   This was sooo easy to do, I don't think I will ever go back to my rotisserie again.  In fact, I think I might sell it!

We ate chicken, and stuffing, and green beans on Saturday night.  Then I pulled the rest of the chicken off the bones (not a hard task in the least), and I put the bones and skin and celery back into the crockpot with the juices that had cooked out and filled it up with water.   I let it cook on low overnight and all day long until just before dinner on Sunday.   Then I scooped all the solid stuff out and poured the broth into a container to freeze once it cooled.  It will make a delicious soup!

We still had the remaining meat from the chicken, so we tossed some on a salad  (details of the salad coming soon!)


We've *still* got some chicken left, too!  And also some lettuce, so I think we're going to make some wraps for lunch!

Read more...

Thursday, June 7, 2012

Dishing It Up Recipe Hop: June Theme--Picnics and Barbeques---Limeade!


School is out.  Summer is here, maybe not yet on the calendar, but certainly on the thermometer!  Even though the past few days in North Texas have been gloriously stormy, the Dishing It Up Gals and I are thinking about eating outdoors!   All of our recipes this month will focus on picnics and barbeques!


I'm going to share with you a quick refreshing drink recipe, that is also very inexpensive to make right now--Limeade!


I have never ever made this before, and honestly never had it at all unless you count the strawberry laden ones I've ordered from Sonic. ;)  However, last week El Rio Grande had limes on sale 15 for $1  (sale going on again this week as well!)  For some unknown reason, I decided to pick up 15 limes while I was there, and then began wondering what on Earth I would do with them.

I decided that I would love to try making homemade limeade, and a quick google search revealed a recipe to me.

The recipe was very, very simple:

2 qt. water
3 limes
2/3 cup of sugar


I doubled the recipe, using a bit less than double the sugar and 6 of my limes, which were on the small side.

I had really no idea what to expect, how sour it would be, or if my family would enjoy it.  I was actually very pleasantly surprised with it.  It had a much milder flavor than I expected--more sweet than sour, but not too sweet, which made it very refreshing, and you felt like you could drink a lot of it.  Some drinks are so sweet or so sour that they make you want to stop drinking after a few sips, but not this one!

My husband loved it, and my oldest daughter wanted to drink it at every single meal.   I think I will be making up some more because she was very sad this morning when I told her there was none left!  My younger daughter liked it too, but she's going through a "everything must be in a sippy cup even though I am perfectly capable of operating a normal cup" phase, and she was frustrated that the lime bits were stopping up her cup spout.


Here are more picnic and barbeque themed recipes for you to peruse.   If you have one of your own, please link it up!


Read more...

Saturday, June 2, 2012

Corn Dog Muffins

I saw a blog post recently that contained some easy lunch ideas.   One of the ideas was so intriguing, i just had to try it out!  You see, my kids love corndogs.   Personally, I've never been a fan of the batter on the store-bought kind.  Plus, those are pretty expensive.

I used to buy the cheap Jiffy cornbread mixes.  They were the cheapest and our favorite, but I've recently been trying to make more things from scratch, and I found this recipe that we all LOVE!  I just had to try these out with our favorite new cornbread!


Here they are before I baked them.  The recipe said it made 12 servings.  I almost doubled it, but didn't have enough butter.  I'm glad I didn't because I actually got 22 muffins out of it.


 I thought that the hot dogs were going to show on top, but the batter baked up all around them.  My girls saw them in the oven and thought I was giving them cupcakes for lunch.  As if!

They were sooo good!  My oldest actually had three of them!  After we all ate, I bagged the rest up and froze them for later lunches.


I've frozen this particular cornbread before, and I know it thaws well, so I'm hoping the hot dogs fare well, also.   I've frozen whole packages before, but never after cooking them.  Anybody done this?

Read more...

Tuesday, May 22, 2012

Citrus Chicken Pasta

I know I never posted this week's menu, but tonight I had planned to make some chicken pot pies for the freezer.  I went to a different Aldi than I usually do today, and they didn't have the roll out pie crusts to go on top of them, and I just wasn't feeling making my own, so I moved on to plan B, which involved foraging through my pantry.

You see, I bought about 7lbs of split chicken  breasts at El Rio Grande last Thursday for $0.69/lb.   Sunday I cooked them all and then cooked the bones down some more to make a stock, so I've got a two big bowls of chicken and stock sitting in my fridge, so I knew whatever I made was going to involve chicken.

I had various pastas, and a few sauce/seasoning packets in the pantry so here is what I came up with.


1 bag of Wacky Mac  ($0.49 after coupon I believe)
1 packet of McCormick Grill Mates Baja Citrus flavor  (free after coupon)
Cooked chicken --I sort of just tossed in a few handfuls until it looked about right....I would guess roughly 2 cups.
1 bag of Bird's Eye Steam Fresh Peas  (I don't remember the price of these)
Sliced Tomatos --I had some small cherry tomatoes in the fridge...I probably used about 10-15 for the whole pot sliced in half.


Directions:
Cook Pasta.  While pasta is cooking prepare Grill Mates as directed on package.  Also, microwave peas, and slice tomatoes.

Drain pasta.  Add in sauce, chicken, peas, and tomatoes.   Heat through (because my chicken was cold) and serve.


It came out pretty good for a quick meal.   My girls gave me a bit of trouble because they could see the seasoning on it and didn't believe me that it wasn't spicy.  I was in the mood for something tangy, so I chose the citrus, but you could use any type of marinade you have on hand that sounds good to you.  You can also use any type of veggie you have in your fridge/freezer that needs to be used up.

Let me know what you would put in it!

Read more...

Thursday, May 17, 2012

Basic Potato Soup Recipe (Freezes Well)

I made this potato soup for my family for the first time ever a few weeks back and we all thought it was delicious.   It also freezes really well!  It is very versatile, and you can make any additions to it that you would like.   I'm going to tell you the basic 5 ingredients that you definitely need, and then a few additions that you might like to make, plus I'll tell you what I put in mine!

Here are the 5 basic ingredients:

3 1/2 cups peeled, diced potatoes  (I used some leftover baked ones from my fridge, so the cook time was shorter)

3 1/2 cups chicken broth

5 tbsp butter

5 tbsp all purpose flour

2 cups of milk

(season to taste!)


Additions you may enjoy:

celery
onions
cheese
ham
broccoli


When I made my soup, I had some ham as well as some broccoli in my fridge, and also some cheddar cheese.   I also had the broth that had cooked off of my ham when I made it, so I substituted ham broth for the chicken broth.


Directions:
In a large pot, bring broth and potatoes to a boil  (also any onions/celery/ham, etc.--anything you add except cheese goes in here).  Simmer until potatoes are tender.  Add desired seasonings to taste.

In a small saucepan, melt butter.  Stir in flour, stirring constantly for about 1 minute.  Slowly whisk in milk (whisk out any lumps).  Cook over medium heat until thick and bubbly, stirring often.  (about 5 minutes)

Remove from heat  (if you are adding cheese, add it now)

Stir into pot with potatoes and heat through.


That'ts it!


You could add any meat/vegetable combination you like and I think it would turn out great.   Let me know what you like in your potato soup!

You know I'm never one to leave a recipe alone, so I may have to try a different combination next time, and I did just buy a 10lb. bag of potatoes!  ;)


Read more...

Tuesday, March 20, 2012

Ham & Broccoli Quiche

Last time my Aunt visited, she made this recipe for us, and we loved it.  This time when she visited, she brought up a BUNCH of eggs from her chickens, and she cooked us a ham.  So, I had a bunch of ham to use up, and excess eggs.  I remembered her making this recipe, and while I didn't *have* the recipe, I remembered what she did well enough to go online and find one that, if not exact, was pretty close.  It tasted the same, anyways. ;)

I will give you the ingredients for one pie, but you can find the recipe here, and alter the amounts to make however many you'd like.  I made two--one to eat and one to freeze!


Ingredients:


6 ounces cooked ham , cut in 1/4 inch dice (11/4 cups)
¾ cup frozen broccoli cuts , thawed
2 ounces monterey jack pepper cheese
2 ounces cheddar cheese
8 large eggs
½ cup milk
½ teaspoon salt
¼ teaspoon pepper


NOTE:  I only had shredded mozzarella cheese, so I used that and it was good.


Directions:


1.  Heat oven to 375°F and grease a 9-inch pie plate.
2.  Scatter ham, broccoli and cheeses evenly in pie plate.


3.  Whisk remaining ingredients in a bowl until blended. Pour into pie plate.
4.  Bake 40 minutes or until firm. Cover top with foil if it starts to get too brown.

That's it!  Super easy, and very yummy!  =)

Read more...

Monday, March 5, 2012

Freezer Meals: Cheddar Chicken

This is one of our favorite freezer meals!  You've been seeing it in my menu plans recently, since I just made a batch of it, so I wanted to post the recipe here.


Ingredients (serves 6--I usually double this so it serves 12 and we get three meals from one batch.):

1 1/2 cups milk
1 1/2 cups chicken broth
3 tablespoons flour
6 ounces shredded sheddar
2 cups cooked chicken
1/4 cup sliced green onions
1/2 cup seeded diced tomato  (for a double batch, I use 1 can)
3 slices bacon, cooked and crumbled.

Serve over cooked egg noodles.


Directions:


Mix together milk, broth, & flour in saucepan.  Heat over medium heat stirring constantly until sauce thickens  (this step takes a bit longer for a double batch, but just keep stirring!)  Add cheese, and stir until it melts.  Add chicken, green onions, tomatoes, and bacon.


At this point you can make fresh noodles and serve immediately (we do one meal this way), or you can cool, and pour into freezer bags and freeze for a later meal (we did two like this).


To serve frozen, simply reheat in a sauce pan (the cookbook recommends thawing overnight first, but I just toss it in straight from the freezer!) and make fresh noodles to serve it over.

This recipe comes from one of my favorite freezer cookbooks:

Read more...

Sunday, March 4, 2012

Carrot Apple Raisin Muffins

As I was going through my refrigerator produce bins yesterday, putting away everything from my Aldi trip, I discovered a bag of carrot shreds that was starting to dry out.   I didn't want them to go to waste, so I asked my husband for some ideas.  

He offered that I could make a carrot cake, though neither of us are very fond of those.  Plus, I prefer to keep my vegetables and my dessert separate. ;)  I did think that a breakfast bread sounded like a good idea, so since I had been awoke very early this morning by my cat, I began browsing online for carrot muffin recipe ideas.

Most of them contained nuts of some sort, of which I had zilch!  Then I came across this recipe posted by a woman with an in-home day care who said the kids LOVED them.  I figured I had found a winner.


Here are the ingredients:

1 cup raisins
2 cups warm water
2 cups all-purpose flour
1 tablespoon baking powder
2 teaspoons baking soda
1 teaspoon salt
1 teaspoon ground cinnamon
4 eggs
1 cup vegetable oil
3/4 cup brown sugar
3 cups shredded carrots


DIRECTIONS:

1. Combine raisins and water in a small bowl. Let soak for 15 minutes. Drain raisins, discard water and set raisins aside.
2. Preheat oven to 350 degrees F (175 degrees C). Grease muffin cups or line with paper muffin liners.
3. In a large bowl, sift together flour, baking powder, baking soda, salt and cinnamon. In a separate bowl, combine eggs, oil and brown sugar; beat well. Combine egg mixture and flour mixture; mix just until moistened. Fold in carrots and drained raisins. Spoon into prepared muffin cups.
4. Bake in preheated oven for 20 to 30 minutes. Let cool for 30 minutes before frosting.


My "shredded carrots" were the long salad shreds, so I sent them for a few spins in my magic bullet.  4 eggs sounds like a lot of eggs, and 3/4 cups of brown sugar didn't sound very sweet to me, so I opted to substitute two of the eggs with several tablespoons of applesauce to replace the volume.  I imagine they may have been a little bit lighter and fluffier had I used eggs, but they very moist and dense, so they were very filling.  I couldn't even finish a second one.

The recipe text tells of a frosting recipe to use, but I just used a tub of cream cheese frosting from my pantry.  The muffins themselves weren't all that sweet, but they were good enough to be eaten without the frosting.  With the frosting, they are delectable.  My youngest thought we were having cupcakes for breakfast!  

The recipe made 18 muffins, and I think we've only eaten 5 or 6 between the 4 of us, so I will be testing how well these freeze!

Read more...

Sunday, February 19, 2012

Homemade Chicken Strips, And What We Did With Them

When I find a good deal on chicken breasts, I tend to stock up.  Last time I found them on sale for $1.00/lb, I bought 7lbs.  I knew I wouldn't be cooking it right away so I threw the whole bag straight into the freezer.  This past week, I thawed out that chicken and cooked it up.

The first thing I do to the chicken, before I ever cook it is marinate it overnight in Italian salad dressing.  This is a trick I learned from my dad.  Any meat he grills, he marinates in Italian dressing, and it gives it such a great flavor, so I began experimenting with it myself, with good results!

I used half of the 7lbs of chicken, and had my husband slice it up into strips.  I've made these twice now, and I've always intended to get some into the freezer, but they always disappear before they make it there.

The meat is already flavored from the dressing, so all I do is toss it in a bit of flour and bread crumbs, and then bake them.


I had a few remaining that didn't fit on the baking sheet, so I fried them up in a little olive oil, and they came out nice a crispy. =)


The night we made the chicken strips, we decided to make chicken toaster sandwiches.  I cooked up some bacon, and we added some lettuce and ranch dressing...just like Sonic. ;)


For lunch the next day, my 2 year old and I just ate them plain, with some ketchup/BBQ sauce to dip them in.  They were delicious that way, too!


The next night (after my produce buying binge), we decided to have dinner salads (changed up the menu a bit), garnished with the chicken tenders, so we sliced the rest up to throw on top of our salads.  Then we sliced and diced some of every veggie-- and several fruits-- in the fridge.

Here's my husband's salad (I promise there's some chicken under all that ranch!):

Now my girls will eat salad, they love it in fact, but they don't like it "put together", so here's what we did for them:

And here was the final result--she actually had two more half plates full, and the little one ate everything but about half of her lettuce!

Our compost pile was even very happy about salad night:


There are so many more things that can be done with chicken strips.  They are very versatile, and very easy to make in bulk!

3.5 lbs of meat (that cost roughly $3.50) lasted us through 3 meals.

I'll be sharing what I did with the rest of the chicken later this week!

Read more...

Wednesday, February 15, 2012

Beef & Barley Soup

Last week I sort of threw together a new recipe from my pantry, and it turned out pretty good, so I wanted to share it with you.  I also will tell you a couple things I might would do differently next time.

I had some beef shank in the freezer that I wanted to use up, and I had some barley in the pantry that I wanted to use up, so I decided...hey, why not beef & barley soup.

I had seen some barley recipes listed in my freezer cookbooks so I figured that it should freeze relatively well, so I decided to make a whole crock-pot full.  (Note:  I've not tried any that's been frozen as of yet.)

The night before, I set out my ingredients (because if it's not in front of my face I tend to forget until around lunchtime, and that's too late to start a slow cooker recipe!)


I was just sort of making this up on the fly, so I grabbed a few "soupy" ingredients.  When we eat vegetables plain, we prefer them fresh or frozen, so I use any canned vegetables I buy for soups and other such dishes.  So I grabbed a can of mixed vegetables, a can of corn, two cans of beef broth, and a can of diced tomatoes to go along with my pack of barley.  (I left the beef in the fridge for the night, obviously.)

In the morning, I put my meat in the crockpot, poured in all these ingredients, and filled it to the top with water.  Then I seasoned it up a bit.


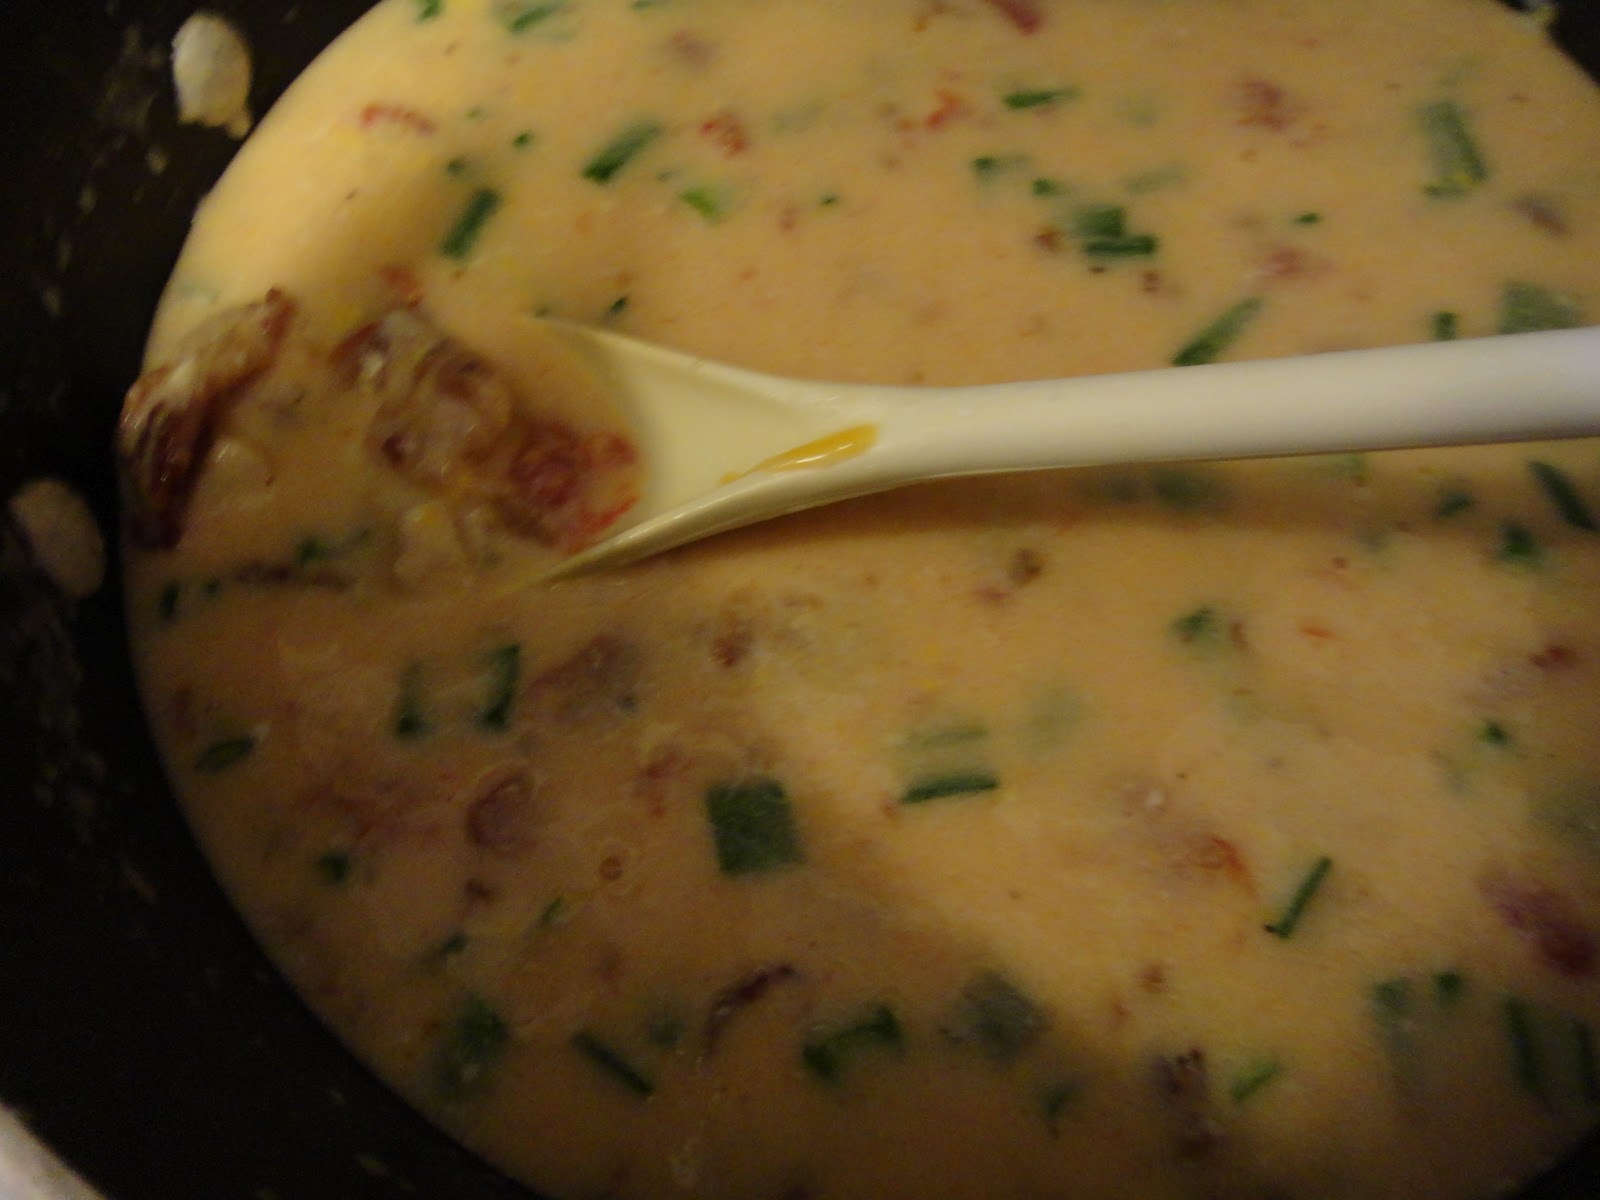
I used the whole pack of barley, and this is what I ended up with.  It didn't seem like that much when I poured it in, but it swelled alot and soaked up a lot of the liquid, and the consistency was much thicker than a normal soup, although it was still quite tasty, and very hearty.  (Side Note:  5 year olds think hearty means "full of hearts" as evidenced by mine using that word to describe her classes Valentine's festivities.)

Next time I make this, I will go a little bit lighter on the barley (maybe half a bag?) and use a bit more beef and veggies.

We ate this for two meals, and I put two more meals into the freezer, so here is the cost break down, and then we will divide it by 4 to get the per meal cost.

Beef shank @$1.19/lb =$3.80
Barley= $0.99
5 cans that I paid no more than $0.50 each for = $2.50

Total:  $7.29 for 4 meals    or   $1.82 per meal (to feed a family of 4--$0.46/person!)

The best part was that I "cooked" once--and by cook, I mean I tossed stuff in a pot and turned a knob--and I can eat 4 times!  I love freezer meals!  =)

Read more...

Wednesday, February 8, 2012

Homemade Sweet Potato Chips

I had some sweet potatoes sitting around in my pantry not getting used up, so I got the bright idea that I would try to make my own sweet potato chips.  I'd tried sweet potato fries in the past, and they've been very hit and miss.  Sometimes they would be nice and crispy and delicious, and sometimes they would not get crispy and would be a bit soggy and mushy and kind of gross.  For that reason, I was a bit nervous about trying to make these chips.  I've never made homemade chips of any form before, so it was definitely experimental.

Tonight's menu involved shredded chicken from the freezer.  I was going to thaw it and make sandwiches, and sandwiches sounded like a good excuse to have chips on the side, so when my husband got home I told him of my plan and asked him to help me slice (I'm a bit stand-off-ish around knives...and he, well, he collects them).  Even he quickly decided that using the knife was going to be a daunting task, so he pulled out the gargantuan meat slicer and used that instead.  It worked very well, it's just going to be a pain to clean all the parts and get it put away.

Slices waiting to be cooked.
 Once they were sliced, we dropped them in small batches into the hot oil in the deep fryer.  The first batch I set the temp about 350, but they were a little chewy, so we turned it up to about 400, and the rest came out nice and crisp.

Frying in the deep fryer.

When they came out of the oil, I sprinkled them with a little bit of salt and pepper.   They were sooo good, I didn't think we were going to have any left to go with dinner because my husband and I kept munching on them.
The finished product.

My 2 year old only wanted to eat these, and not her sandwich!

I couldn't believe how easy they were to make and how tasty they came out.  I'm starting to wonder why I ever pay for chips at all!

Read more...

Thursday, January 26, 2012

Dishing It Up Recipe Hop: Slow Cooker Recipes--All Day Apple Butter

Photobucket


We all have them....those apples that have gotten dropped or bruised and they have a mushy brown spot and no one wants to eat them.

What do you do with those?  Do you throw them out?  That's what my family tries to do, but I say NO!

This week as I was cleaning out my produce drawer, I found a lot of apples like this, and pears as well, that kept getting pushed aside instead of selected and eaten, so I decided that I would peel them, slice them (removing the offending spots, of course!), and toss them into the crockpot for the day.

The outakes

This is only my second attempt at this recipe, and the first time I left the peels on, and it did not come out nearly so yummy.  That's what my laziness got me.  This time...no peels....delicious!

I started with this recipe from Taste of Home: Freezer Pleasers (it's my all time favorite freezer cookbook and very much on sale at the time I'm typing this!!)


Ingredients (as written in the book):
5 1/2 lbs apples   peeled and finely chopped
4 cups of sugar  (it does say to adjust sugar to taste depending on type of apple)
2-3 teaspoons ground cinnamon
1/4 teaspoon cloves
1/4 teaspoon salt


Put it all in the crockpot.  Cook on high for 1 hour and then on low for 9 hours.  (Personally, I add a bit of water for fear it will scorch, and then I cook on high for about 4 hours and then on low uncovered for another 1-2 to let the extra water cook off.)

Ready to start cooking.


What I did:
I used what I had on hand that I knew wouldn't be eaten.  That included apples and very sweet and juicy pears, and I do not believe I had a full 5 lbs, maybe 3-4.  I used only 1 cup of sugar, and thought they turned out plenty sweet enough.  I also did not have any cloves, so I left them out (still delicious!)

I've already had several slices of buttered toast slathered with this, and it was delectable!  Also, since it comes from a freezer cookbook, that means it freezes well.  I divided it up into small portions for the freezer, also.


Please check out the other slow cooker meals from my friends at Thrifty Texas Penny, Pary Moppins, Deals From MS Do, The Happy Lil Homemaker, Mama's Money TreeEating With Mimi, 20SomethingSaver, and Dearly Domestic listed below.  If you have a slow cooker meal, link up!  Please add our button to your post to help spread the word!


Read more...

Thursday, January 5, 2012

Dishing It Up Recipe Hop: Slow Cooker Meals--Easy Vegetable Beef Soup

Photobucket

This is a new year and my recipe hop partners and I wanted to try doing things a little bit different!  We are going to be posting on Thursday mornings now instead of Saturdays.  We are going to be sticking with monthly themes, and we have some giveaways in the works!

This month out theme is slow cooker meals.  We all love cooking with our slow cooker because they are sooo versatile, and oh so easy to use!  (and pretty much fool proof!  Although, I do admit to burning a roast in a crock-pot my first year of marriage!)

The recipe I'm going to share with you this week is one I just cooked last week.  I pulled ingredients out of my pantry to make it purely based on items I had on hand (that I had purchased with coupons!), and I must say it was one of my best soups!

I made this meal in a large crock-pot.  If you have a smaller one, you may wish to cut down on the meat, and use only 2 cans of each of the other ingredients.  My family of 4 ate two dinners, and a lunch off of this, and then put one meal into the freezer.


Ingredients:
2-3 lbs Beef  (I used ~2 1/2lbs of beef shank that I purchased for just $1.59/lb)  *Note: On sale through 1/10 for same price*
3 cans beef broth
3 broth cans full of water
3 cans mixed vegtables
season to taste

Directions:
Place all ingredients into the crockpot (I tossed the meat in frozen).  Cook on high until meat is tender.

Note*:  You really can't mess up a soup in a crockpot.  The longer it cooks the more tender the beef is and the better the flavor if you ask me.  I usually start these around 10am, and turn them down to low heat mid afternoon.  If you work, you may wish to let it simmer on low all day.

Cost Breakdown:
Beef (half of the 5 lbs I bought)= $3.80
Beef Broth  (3 cans @ $0.49 each)= $1.47
Mixed Vegetables(3 cans @ $0.26 each) = $0.78

Total cost $6.05 and that fed/will feed us 4 meals!  That's $1.51 per meal for a family of 4!


Please check out the other slow cooker meals from my friends at Thrifty Texas Penny, Pary Moppins, Deals From MS Do, The Happy Lil Homemaker, Mama's Money TreeEating With Mimi, 20SomethingSaver, and Dearly Domestic listed below.  If you have a slow cooker meal, link up!  Please add our button to your post to help spread the word!


Read more...

Monday, January 2, 2012

Dinner With This Weeks Deals: Easy Cabbage Roll Casserole

I have shared my grandmother's delicious cabbage roll recipe with you guys before.  It's always been a new years tradition in my family to have her cabbage rolls.  On past New Year's I've made them myself, but it is a very time consuming, messy recipe to make, and yesterday I was home alone with the kids, and didn't think it would be wise to have my hands in raw meat for as long as it would have taken to get them stuffed and rolled.

I was chatting with my Aunt on facebook telling her that I didn't think I would be able to make them, and she suggested an alternative to the rolls, using the same ingredients in a sort of meat loaf type dish.

I decided to take that suggestion and go with it.

Ingredients:


half a green cabbage, chopped (can be as small or large as you like it)
1-1 1/2 lbs. ground beef, raw (or turkey should work)  *Use lean because it was a bit greasy.*
1-1 1/2 cups uncooked rice
1 can beef broth
1 can water (to cover rice)
1 can tomato sauce
season to taste

Directions:


Place chopped cabbage, crumbled ground beef, and rice into casserole dish.  Add seasonings and mix well by hand.

Before liquids are added, this is how it looked.

Pour in broth and water.  Pour tomato sauce on top.

Bake covered at 350 for about 1 hour or until rice is nearly cooked.  Uncovered and continue baking 15-20 minutes or until some of the water cooks off.

Fresh out of the oven.

It was delicious!

This was also a very inexpensive meal to make.

Cost Breakdown:
 1 1/2 lbs ground beef @ $1.69/lb = $2.53
*maybe 1lb. of cabbage @ 3lbs for $1 =  $0.33
1 can of tomato sauce @ 4 for $1 =  $0.25
1 can beef broth =  $0.49
rice, roughly half of a bag I got for $0.39 = $0.19

Total:  $3.79, and we will be having leftovers tonight, so that is just $1.90 per meal for a family of 4.

Read more...

Saturday, December 10, 2011

Dishing It Up Recipe Hop: Freezer Meals--Turkey/Chicken Taco Quiche


As the holidays approach and the kids will be out of school, life may get a little more hectic.  A great way to combat that, at dinner time at least, is to have ready made meals waiting in the freezer!

This week's recipe hop is devoted to meals that freeze well.  I'm going to be sharing with you one of our favorites.  In fact, I just made 4 of these from our turkey leftovers!  (Chicken works just as well.)


Turkey Taco Quiche   (recipe adapted from here)


Ingredients  (recipe makes 2 quiches):

  • 2 unbaked pastry shells  (I use frozen deep dish pie shells)
  • 2 cups cooked turkey/chicken (shredded)
  • 2 envelopes taco seasoning, divided
  • 2/3 cup salsa
  • 2 cups shredded cheddar cheese
  • 8 eggs
  • 2 cups half and half  
  • 2 tablespoons butter, melted
  • 1 can chopped green chilies  (optional)
  • 1/2 cup sliced ripe olives (optional)

Directions:

In a small bowl, combine meat and one envelope taco seasoning.  Spoon mixture into pie shells.   Top with salsa and cheese.


In a large bowl, whisk together eggs, half and half, butter, and remaining taco seasoning.  Stir in optional ingredients if desired.  Pour over cheese.


    To Cook Immediately:

    Bake at 400* for 33-35 minutes or until a knife inserted into the center comes out clean.  Let stand for 10 minutes before cutting.


    Freeze the other(s) wrapped in foil for up to 3 months.  *NOTE*  Please place them onto a baking sheet before putting them into the freezer.  They will overflow and spill eggy-taco goo all into your freezer if you do not.  Simply let them freeze overnight (don't forget them!) and then when they are solid, wrap in foil and place into a freezer bag.  I drop a labeled note card into the bag with cooking instructions.

    To Use Frozen:

    Remove from freezer 30 minutes before baking.  Do not thaw.  Cover edges of crust with foil to prevent excess browning.  Bake at 400* for 70-75 minutes or until a knife inserted in the center comes out clean.  Let stand 10 minutes before cutting.


    If you'd like some more great freezer recipes, check out the links below.  If you have a great freezer recipe, link it up!


    Read more...

    Friday, December 9, 2011

    Smiley360 Mission: The New Pam Challenge

    As a member of Smiley360, I am occasionally asked to participate in "missions" in which I try various products and give my feedback.

    The most recent item I've been asked to try is Pam cooking spray.  It's manufacturers have reformulated it and say it works 70% better now.  They wanted the members of Smiley360 to put that claim to the test.

    We were sent a coupon to purchase a can of Pam cooking spray for FREE, as well as the same for a can of Hunt's tomatoes (in case our recipe needed any, I suppose).  We also received a FREE large Pyrex casserole dish, that you will see in the pictures, and a Pam spatula.

    Now let me just say that it has been a very, very long time since I have purchased Pam.  I have just about *always* purchased store brand cooking sprays, you know unless there was an awesome sale and I had a coupon that would triple or something.  And then I would just about *always* have to struggle and scrape thing off afterwards.

    I have to say that my husband and I were AMAZED using this product.  First of all, I used it to spray the pans for all of my Thanksgiving Day baking, and not a single thing stuck.  Everything just slid right off of the pans.  I've since used it for simple things like baking chicken nuggets or popcorn shrimp, because those always stick also, but not with this stuff!

    Tonight, I finally put that baking dish to the test.  I tweaked this enchilada casserole recipe just a bit.  I used chicken breast that I had marinated in picante sauce and slow cooked with some taco seasoning until it shredded.  I didn't have any enchilada sauce, so I used a cream of mushroom and a cream of chicken, and added a taco seasoning to that as well.  It turned out delicious!

    Here's how I made it.  First I sprayed the bottom of the dish with the Pam.  I usually spread sauce on the bottom before lining with tortillas because it always sticks, but I wanted to really put the Pam to the test, so I put the tortillas right on in there.  Then I layered on the meat, sauce cheese, more tortillas, repeat.


    Everything was fully cooked, so I just needed to pop it in the oven about 20 minutes to melt the cheese and heat the sauce thoroughly.  When it was time to serve, here's what happened:


    *Sniff*  It's beautiful!  My husband, after the first use, decided that the scrubbing and scraping saved is worth spending the extra money on, and I've since for it on sale at Tom Thumb, and matched a coupon up with the sale to snag another smaller can of it for $1.49.  This is definitely going on my "be on the lookout for sales and coupons" list.

    If you'd like to try it for yourself, risk free, Pam is currently offering a Money Back Guarantee form on their facebook page.  I'm pretty sure you won't need it though!  ;)


    Disclosure:  I was not compensated for this post other than the free products.  This post was not even required of me.  I chose to write it because I liked the stuff so much I wanted to show and share.  All opinions are my own.

    Read more...

    Total Pageviews

    StatCounter

    Related Posts Plugin for WordPress, Blogger...

    Disclosure

    Some of the links/images on my site may contain affiliate links. I may or may not receive compensation from them, but all opinions on this site are my own, and I will never post a deal that I would not do myself or a site that I have not signed up for and believe to be legitimate.

    About Me